2025. 2. 14. 17:43ㆍIT
=================================================================================
- 번들링(bundling): JavaScript 파일과 관련 리소스들(ex image, stylesheet 등)을 하나의 파일로 묶는 작업을 말한다.
- 번들(bundle): 번들러(bundler)에 의해 번들링(bundling)을 거쳐 생성된 리소스들의 집합.
- React Native는 기본적으로 JavaScript 코드를 사용해 개발을 한다. JavaScript는 런타임 시 코드가 해석되므로 앱을 실행하기 위해서는 JavaScript 코드를 디바이스에서 실행 가능한 형태로 변환해야 함.
- 번들링은 모든 코드와 관련 리소스를 하나의 파일로 묶기 때문에 앱 실행할 때마다 JavaScript를 개별적으로 다운로드 할 필요가 없다. 즉, 하나의 파일에 필요한 리소스만 포함한 최적화 상태이므로 앱의 용량도 줄이고 성능도 향상시킬 수 있음.
=================================================================================
윈도우는 요기참고
https://microsoft.github.io/react-native-windows/docs/getting-started
RN인스톨
- 기존에 설치등이 중복으로 있을수 있으니 제거
| yarn global remove react-native yarn global remove react-native-cli npm uninstall -g react-native npm uninstall -g react-native-cli |
- 설치
| yarn global list npm -g list install new react-native global npm install -g react-native-cli npm install -g react-native |
Example
- 프로젝트 생성
| npx react-native init ProjectName |
- 안드프로젝트 스튜디오로 열고 빌드해서 실행하면 오류가 발생 하는것을 볼수 있음.
| Unable to load script.Make sure you are either running a Metro server or that your bundle 'index.android.bundle' is packaged correctly for release |
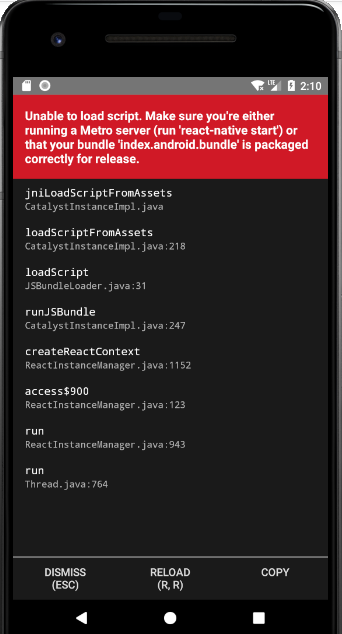
- index.js 파일을 안드 플랫폼에 맞춰 빌드 해준다. stackoverflow 짱!
| Step 1: Create a directory in android/app/src/main/assets Linux command: mkdir android/app/src/main/assets Step 2: Rename index.android.js (in root directory) to index.js (Maybe there is an index.js file in which case you do not need to rename it) then run the following command: react-native bundle --platform android --dev false --entry-file index.js --bundle-output android/app/src/main/assets/index.android.bundle --assets-dest android/app/src/main/res |
| ex) npx react-native bundle --platform android --dev false --entry-file index.js --bundle-output /Users/sssss/Downloads/AwesomeProject/android/app/src/main/assets/index.android.bundle |

- 다시 스튜디오에서 빌드 하면! 성공!
추가로 IOS !!
react-native bundle --dev false --entry-file index.js --bundle-output ios/main.jsbundle --assets-dest ./ios --platform iosBundle 만드는데 시간이 걸릴수 있음.
리엑트네이티브뷰로 파일불러와서 재생!
추가로 웹 베이스!!!!!
# webpack 관련 패키지 설치
npm install --save-dev webpack webpack-cli
npm install --save-dev webpack-dev-server html-webpack-plugin
npm install --save-dev webpack-dev-server html-webpack-plugin --legacy-peer-deps
npm uninstall -g react-dom
npm install --legacy-peer-deps //--legacy-peer-deps 플래그로 설치를 실행하면 종속성 충돌을 우회할 수 있습니다. 이 플래그는 피어 종속성 문제를 무시합니다.
npm install react-dom --legacy-peer-deps ->>> 설치해서 빌드 하다보면 버전이 안맞을수 있다..
npm install -save react-dom@18.3.0 //프로젝트에설치
npm install -g react-dom@18.3.0  //전역 설치
npm install --save-dev babel-loader @babel/core @babel/preset-react --legacy-peer-deps
요건 설치해도 되구 말아도 되궁..
npm install -save react-scripts
이것저것 설치해서 package.json 훌터보면
{
  "name": "AwesomeProject",
  "version": "0.0.1",
  "private": true,
  "scripts": {
    "android": "react-native run-android",
    "ios": "react-native run-ios",
    "lint": "eslint .",
    "start": "react-native start",
    "test": "jest",
    "start:webs": "webpack serve --config ./webpack.config.js --mode development",
    "start:web": "webpack --config ./webpack.config.js",
    "start:web2": "react-scripts start",
    "build:web2": "react-scripts build"
  },
  "dependencies": {
    "matter-js": "^0.20.0",
    "react": "18.3.1",
    "react-dom": "^18.3.0",
    "react-native": "0.77.1",
    "react-native-game-engine": "^1.2.0",
    "react-native-web": "^0.19.0",
    "react-scripts": "^5.0.1"
  },
  "devDependencies": {
    "@babel/core": "^7.26.9",
    "@babel/preset-env": "^7.25.3",
    "@babel/preset-react": "^7.26.3",
    "@babel/preset-typescript": "^7.26.0",
    "@babel/runtime": "^7.25.0",
    "@react-native-community/cli": "15.0.1",
    "@react-native-community/cli-platform-android": "15.0.1",
    "@react-native-community/cli-platform-ios": "15.0.1",
    "@react-native/babel-preset": "0.77.1",
    "@react-native/eslint-config": "0.77.1",
    "@react-native/metro-config": "0.77.1",
    "@react-native/typescript-config": "0.77.1",
    "@types/jest": "^29.5.13",
    "@types/react": "^18.2.6",
    "@types/react-test-renderer": "^18.0.0",
    "babel-loader": "^9.2.1",
    "eslint": "^8.19.0",
    "html-webpack-plugin": "^5.6.3",
    "jest": "^29.6.3",
    "prettier": "2.8.8",
    "react-test-renderer": "18.3.1",
    "typescript": "^5.7.3",
    "webpack": "^5.98.0",
    "webpack-cli": "^6.0.1",
    "webpack-dev-server": "^5.2.0"
  },
  "engines": {
    "node": ">=18"
  },
  "browserslist": {
    "production": [
      ">0.2%",
      "not dead",
      "not op_mini all"
    ],
    "development": [
      "last 1 chrome version",
      "last 1 firefox version",
      "last 1 safari version"
    ]
  }
}
수동으로 넣어주자
"start:webs": "webpack serve --config ./webpack.config.js --mode development",
"start:web": "webpack --config ./webpack.config.js",
webpack.config.js 만들고
const path = require('path');

// 애플리케이션의 root 디렉토리의 경로를 절대 경로로 나타냄
const appDirectory = path.resolve(__dirname);

const HTMLWebpackPlugin = require('html-webpack-plugin');

// Webpack이 번들링한 결과물인 CSS나 JavaScript 파일들을 자동으로 <link>나 <script> 태그로 삽입함
const HTMLWebpackPluginConfig = new HTMLWebpackPlugin({
  template: path.resolve(__dirname, './public/index.html'),
  filename: 'index.html',
  inject: 'body',
});

// JavaScript 파일 변환을 위한 Babel 로더 설정
const babelLoaderConfiguration = {
  // test: /\.tsx?$/,  // .js 또는 .jsx 확장자를 가진 파일을 대상으로 함
  include: [
    // path.resolve(appDirectory, 'src/index.web.tsx'),  // index.web.js 파일 포함
    // path.resolve(appDirectory, 'src/App.web.tsx'),    // App.web.js 파일 포함
    path.resolve(appDirectory, 'src'),           // src 디렉토리 포함
  ],
  exclude: /node_modules\/(?!()\/).*/,  // 번들링할 때 node_modules에 있는 파일을 제외함
  use: {
    loader: 'babel-loader',  // babel-loader 사용
    options: {
      cacheDirectory: true,  // 변환 결과를 캐시하여 성능을 향상시킴
      presets: ['@babel/preset-react'],  // React 프리셋 사용
    },
  },
};

module.exports = {
  entry: path.join(appDirectory, 'src/index.web.tsx'),
  output: {
    filename: 'web-bundle.js', // 번들링이 된 파일의 이름
    path: path.join(appDirectory, '/public'), // 번들링이 된 파일이 생성될 경로
  },
  resolve: {
    // Webpack이 모듈을 해석할 때 인식할 확장자들을 설정합니다.
    extensions: ['.ts', '.tsx', '.js', '.json'],
    // 모듈을 간결하게 참조하거나 다른 모듈로 대체할 수 있는 별칭(alias)을 설정합니다.
    alias: {
      // 'react-native' 모듈을 'react-native-web'으로 대체하여 웹에서 React Native 코드를 실행할 수 있도록 합니다.
      'react-native$': 'react-native-web',
    },
  },
  plugins: [HTMLWebpackPluginConfig],
  devServer: {
    open: true, // 개발 서버를 실행할 때 자동으로 브라우저를 열지 여부를 설정
    historyApiFallback: true, // SPA(Single Page Application)에서 브라우저의 History API를 사용하기 위함
    hot: true, // 코드 변경 시 페이지 새로고침 없이 모듈을 실시간으로 교체할지 여부
  },
  module: {
    rules: [babelLoaderConfiguration], // babel 설정 적용
  },


};
src 폴더 만들어서 index.web.tsx , App.web.tsx 만들어서 넣고.
index.web.tsx
import React from 'react';
import App from './App.web';

import {createRoot} from 'react-dom/client';

const container = document.getElementById('app');
const root = createRoot(container);
root.render(<App />);

//밑에 걸로 해두됨
// import { AppRegistry } from "react-native";
// import App from "./App.web";
// AppRegistry.registerComponent("App", () => App);
// AppRegistry.runApplication("App", {
//   rootTag: document.getElementById("app")
// });
App.web.tsx
import React from 'react';
import {ScrollView, ImageBackground, Text, StyleSheet, Image, View, Alert, Button, Pressable, TouchableOpacity} from 'react-native';
import {NativeModules} from 'react-native';

function Chat() {
  _clickItem = (item) => {
    console.log(item);
  };

  return (
    <View>
      <Button title={"안녕"} onPress={this._clickItem.bind(this)} />
    </View>
  );
};

export default Chat;
./public 폴더 만들고 index.html 만들어 넣자
<!DOCTYPE html>
<html lang="ko" class="body">
<head>
  <meta charset="UTF-8">
  <meta name="viewport" content="width=device-width, initial-scale=1.0">
  <title>React Native for Web</title>

  <style>

  	.html, .body {
  		margin: 0;
  		height: 100%;
  		overflow: hidden;
  	}

  </style>
</head>
<body class="body">
  <div id="app" class="body"></div>
</body>
</html>
마지막으로!
npm run start:webs
'IT' 카테고리의 다른 글
| MAC OS JAVA_HOME 환경설정 추가 및 JDK 버전 변경 (0) | 2024.02.07 |
|---|---|
| wsl2 윈도우10 에서 GUI 적용하기 (0) | 2022.04.27 |
| webrtc 리눅스 빌드 참고 (wsl) (0) | 2022.04.25 |
| 윈도우 젠킨스 설정 (0) | 2022.02.24 |
| 젠킨스 + bitbucket + fastlane (0) | 2022.02.23 |